Wine and a wall

Legs up the wall with a glass of wineOur flat in Munich is a ways out of the city and U-Bahn construction at the closest station means that cycling is the most efficient method for getting around. It’s been a long time since I’ve done any pedalling and my leg muscles are struggling with this newfound exertion.

Thankfully, our flat has a lovely open wall that’s perfect for my favourite restorative yoga pose – legs up the wall. Pair the leg-relaxing posture with a glass of wine and the strain in my lower body disappears!

The pose itself is super-easy (see my how-to in a previous post) – the most difficult part is managing the glass! I’m careful to make sure the wine is safe coming into and out of legs up the wall and set the glass within easy reach for the 10-15 minutes I’m laying on the floor.

Sipping while supine is challenging, but the relaxation is well worth it!

Unease in easy pose

Laura sitting in easy pose on a Hawaiian beachSukasana or easy pose is sometimes decidedly not easy. In fact, it’s name is often a misnomer and holding the pose can be very challenging for anyone who has troublesome ankles, knees, or hips.

Without a block or bolster under my seat, ‘easy pose’ becomes ‘incredibly-hard-and-uncomfortable pose’ for me within a couple minutes. Knee injuries, tight hips, and internal femoral rotation come together to make sitting cross-legged a hard pose to hold when I’m not propped. Which means I’m rarely in sukasana without something tucked under my butt – even if it’s only a folded mat or sweater.

Just about everyone who’s taken a yoga class has done easy pose. It’s often where a practice begins and ends and is the most common position for meditating. If you find sukasana decidedly uneasy, try adding height under your seat – props can make a huge difference!

Easy pose

Why it’s good

  • Stretches knee and ankle joints – and sometimes the hips as well
  • Help strengthen the muscles along your spine (erector spinae) and contributes to good posture
  • Helps calm your mind and manage stress when you hold the pose as part of meditation

How to do it

  • Sit on your mat or the floor, with your buttocks on the edge of a cushion, block, bolster, or folded blanket
    • Sitting on something tilts your pelvis forward and helps your knees come to the floor
    • The higher your seat, the easier it is to relax your hips and soften your knees
  • Bend your knees so they fall to the outside of your body and place one foot in front of the other
    • Avoid crossing your ankles, which puts pressure on the joints
    • Add padding under your ankles and/or feet if they are sensitive or if the floor is particularly hard
    • If your knees aren’t resting comfortably, support them with folded blankets or blocks
  • Find the centre of your seat by moving  back and forth and from side to side

    • You should feel evenly balanced – right and left, front and back
  • Straighten your spine, roll your shoulders back and down, and lift through your collar bones
  • Rest your hands on your knees or thighs or in your lap; relax your hips and legs
  • Feel the crown of your head float up towards the ceiling, connecting you with the sky; feel your sitting bones grow heavy, rooting you into the earth
  • Bring balance to the pose by alternating sides
    • If you’re holding easy pose for a few minutes, switch your front leg halfway through
    • If you’re coming into easy pose multiple times in a practice, change which leg is in front each time

To come out of easy pose:

  • Uncross your legs (using your arms and hands to help if you’d like) and slowly unbend your knees
  • Gently bring movement back into your legs
    • Straighten and bounce your legs
    • Rest the soles of your feet on the mat/floor, bend your knees,  and drop them side-to-side in windshield wipers
  • Carry on with the rest of your practice or the rest of your day

Easy pose externally rotates the hips, so you may wish to counter it with an internally rotated pose like deer (see how to do deer pose on YinYoga.com), although many people feel no need for any counter pose at all.

Pose like an Egyptian

Laura holding sphinx pose on top of a big rockBack-bending sphinx pose can’t help bring to mind the Great Sphinx of Giza in Egypt. I like using that enormous limestone statue as inspiration when holding the posture in a yin yoga practice: level gaze, long neck, relaxed shoulders, and unstrained stillness.

Dogs are also phenomenal models for sphinx. My dog, Sofie, often flops down into sphinx to wait for the next bit of excitement to cross her path.

In a yin yoga practice, the purpose of sphinx is not to bend your lower back as much as you possibly can, but to use your arms and belly to support the weight of your torso and let your back soften. It’s even better if you can convince your neck, shoulders, hips, and legs to relax as well.

Resist the temptation to come into your deepest back bend; instead, find a comfortable compression through your low back. You can always intensify the posture as you sink into it. Likewise, you can always reduce the intensity if you’re getting warning signs that it’s becoming too much.

The gentlest sphinx is simply resting flat on your stomach with your chin on your hands – although that’s certainly resembles the sphinx in Egypt a lot less!

Sphinx

Why it’s good

  • Compresses the lower back, which counters our strong forward-folding tendencies
    • we rarely bend backwards in the course of our daily lives, but often bend forwards (e.g. while driving, working at a computer, reading, lifting groceries/kids/dogs)
  • Helps to create a flexible spine and tone back muscles
  • Stretches stomach muscles and helps open the throat and upper chest
  • Can release tension from the shoulder blades/mid-back
  • Aids in detoxification
    • releasing the pose give the kidneys a fresh supply of blood, which that flushes out toxins

How to do it

  • Start by lying facedown
    • let your belly press into the mat as you breathe
  • Draw your forearms under your chest with elbows bent
    • keep your elbows ahead of your shoulders
  • Rest the weight of your torso onto your forearms and relax your shoulders
    • feel your shoulders drop away from your ears; allow your shoulder blades to soften
  • Keep your chest and collar bones open
    • feel your lungs expand in all directions with every inhale and let go of tension with every exhale
  • Experiment with the positioning of your arms, hands, legs, and head until you find the right balance of compression in your low back, stretch along your front, and ease through your shoulders
    • To decrease compression in your low back:
      • draw your elbows further away from your chest, letting your torso come closer to the floor
      • widen your legs and/or your elbows/forearms
    • To increase compression in your low back
      • bring your elbows closer to your chest (just as long as they’re still ahead of your shoulders)
      • narrow your legs
      • rest your forearms on a bolster or block to bring your chest further from the floor
      • bend your knees and let your heels come towards your buttocks
    • To reduce stress on your shoulders and release tension in your upper back
      • rest your torso on a folded blanket, block, or bolster
      • place a soft, small weight (like an eye pillow or bean bag) between your shoulder blades to encourage them to relax
    • To stretch the back of your neck and stimulate your throat
      • drop your chin towards your chest without compressing into your collar bones – don’t round your upper back
    • To stretch your throat and compress the back of your neck
      • turn your face towards the ceiling, being sure to keep your jaw and throat relaxed
  • Keep your head centred between your shoulders and your allow your eyes to close or your gaze to soften
  • Hold sphinx pose for up to six minutes
    • adjust your head/arm/leg positioning as necessary to intensify or lessen the compression in your low back, but resist fidgeting

To come out of sphinx:

  • For a little extra stretch, inhale and draw the crown of your head upwards, without letting your shoulders come towards your ears
  • As you exhale, gently slide your elbows outwards, slowly lowering your torso to the mat
  • Rest on your belly for a few moments, enjoying the flow of energy and fluid through your low back

Child’s pose is good counter to release the lower back, but some people find that simply lying on their stomachs and letting their breath move to the area that was compressed in sphinx is enough to relieve low-back tension.

Sunny salutations

Laura in a standing salute in the snowGorgeous weather calls for celebratory yoga. And what better way to honour the sun than with a salutation?

Sun salutations are sequences with easy to remember poses that flow into each other, allowing you to focus on the moment and the movement. When you’re not worrying about what posture comes next, you can let your breath dictate your transitions and let your brain zone out.

There are many different versions of sun salutations, most of which are based on the traditional Sun Salutation A. While I like the sequences of the traditional sun salutations, I most often adapt the flow depending on what body parts feel like they need more attention and the circumstances of my practice.

Modified sun salutations are great for travel; it’s easy to adapt the sequence to take up very little floor space or to do without a mat. I’ve done something like the sequence below on muddy trails, sandy beaches, between beds on hotel room floors, and even in the snow while wearing boots as shown in the photo.

Don’t worry if you miss a breath or two or forget what side you’re on. You can always come back to the start and re-group in Mountain pose. It’s really about moving and breathing… the poses and flow are just there to help get things going!

Hands-free sun salutation

This probably looks like a lot of steps, but it’s surprising how smooth the movements become and how quickly you can glide through a full sequence.

Why it’s good

  • Gets circulation going and works your cardiovascular system
    • good for warming up the body and generating heat!
  • Stimulates the lymphatic system
  • Strengthens and gently tones a range of muscles – from the ones along your spine to your shoulders & arms and into your legs
  • Stretches most muscles along the front & back body (abs, back, hips, hamstrings, shoulders, chest, calves, neck)
  • Works your joints – from toes & ankles up through your neck & shoulders – in a healthy way
  • Encourages balance and deep breathing

How to do it

  • Start standing in Mountain pose
    • standing tall, with even pressure on both feet
  • As you inhale, come into a Salute
    • raise arms above your head; palms facing, fingers reaching to the sky
  • As you exhale, bend backwards into a Standing Back Bend
    • look upwards, open your chest, and draw shoulders back
  • Inhale to bring yourself back to Centre
    • bring neck and back straight, arms stay up
  • Exhale slowly into a Swan Dive
    • gracefully lower chest towards thighs, sweeping arms wide
  • Hold a Forward Fold for a full cycle of breath
    → inhale to lengthen your spine & exhale to soften your torso

    • hold each elbow with each palm, hips lift upwards, torso relaxes
  • As you inhale, come into Half-forward Fold
    • back flat and parallel to ground, palms resting on your knees, look forward
  • Exhale into a Forward Fold again
    • chest towards thighs, fingertips towards the ground, bend your knees if necessary
  • With an inhale, bring your Right Leg Back to Lunge
    • shift weight to left side, keeping your left knee at 90° and directly over your ankle
  • Exhale to settle into the Lunge
    • sink hips your hips lower if comfortable and make sure pelvis stays even; rest your hands on your left thigh or at your sides
  • Inhale to raise your arms up into a Back-bending Lunge
    • arms are shoulder-width apart and shoulders stay relaxed; open your chest as much as comfortable
  • Exhale into another Forward Fold
    • let your shoulders and hips relax as your arms extend towards the ground and your feet come parallel and hip-width apart
  • Inhale to draw your Left Leg Back to Lunge
    • shift weight to right side, right knee bent at 90° and directly over your ankle
  • Use your exhale to settle into the Lunge on this side
    • keep your hips from sagging, rest your hands on your right thigh or alongside your torso, and feel the strength in your legs
  • Inhale, drawing your arms up into a Back-bending Lunge
    • shoulders relaxed and rolled back with your chest open
  • Exhale to bring your feet together into Forward Fold
    • torso relaxes towards thighs, arms dangle down, feet come together
  • Inhale and lengthen your spine into Half-forward Fold
    • gazing forward with a flat back
  • Exhale into the last Forward Fold of the sequence
    • bend your knees a little to relax your legs, relax your shoulders and let your arms hang down
  • With a slow inhale, sweep up to a Salute
    • bring your arms wide and palms facing as you raise your torso with a flat back
  • Exhale and draw your palms together and lower your arms into Mountain with Prayer
    • lightly press your hands together in front of your chest, relax your shoulders, feel both feet grounded

Repeat the series a few times, switching which leg moves back into the lunge first if you’d like. And, of course, find your own modifications dependent on what your circumstances are like!

Last class standing

Laura in mountain with palms together at heart centreAs I mentioned in January, I’m reducing my teaching commitments to free myself to make the next leap.

While I’m still not certain what that leap is, I know that I’ll only be teaching one class a week. The last class standing is the 6:30pm yin yoga class at Bound Lotus Meditation & Yoga Centre in North Vancouver.

Yin is consistently one of my favourite styles of yoga to practice and teach. There are many reasons why I do yin yoga, mostly I love the stillness and the meditativeness.

Outside of a yin yoga practice, I like finding a moment or two of stillness and a few meditative breaths in mountain pose (or tadasana). Mountain pose is simply standing; well-balanced, connected through the soles of your feet… allowing your lower body to be heavy and grounded, while your upper body stays light and floats upwards.

In a typical yoga practice, I often use mountain as a foundation for other standing postures and as part of sun salutation sequences, but it’s also lovely to do on it’s own. It’s easy to sneak in a little mountain-meditation throughout the day – waiting for lights when walking, queuing in line, doing dishes… any time you’re standing is a good time for a few mountain breaths!

Mountain pose

Why it’s good

  • Helps improve posture, develops balance, and creates body awareness
  • Strengthens and gently tones abdominal and back muscles as you engage your core to keep upright
  • Engages the muscles in your legs and buttocks, creating strong thighs, knees, ankles, and buttocks
  • Connects all the energy centres of the body, helping you feel more aligned and centred
  • Allows you to take a pause in your day and focus on your mental and physical experience

How to do it

  • Stand with your feet parallel and roughly hip distance apart
    • Changing foot width varies the balance point; most people find this pose challenges their balance more feet closer together
  • Gently sway your body to connect all parts of your feet to the mat or floor and feel your weight evenly balanced (front & back, left & right) before coming to stillness
  • Roll your shoulders back and down (away from your ears) a few times before allowing your arms to rest alongside your body
    • Many people like to rotate their arms to allow their thumbs to point away from their bodies; listen to what’s best for your body and let your arms rest wherever they feel comfortable
  • Let your collarbones soften and spread, feeling a gentle lift coming from your upper chest
  • Feel the crown of your head floating towards the sky and tuck your chin in slightly to keep your neck in-line with the rest of your spine
    • Lightly engage your core and leg muscles to keep your spine straight
    • Sense the tallness of your body
  • Allow your lower body to feel rooted, grounded, connecting you with the earth while your upper body feels light, weightless, floating upwards and connecting you with the sky
  • Breath deeply and smoothly through your nose for several breaths, letting the still, solidness of a mountain fill you

To come out of mountain:

  • Simply step into your next pose or move on with your day!


The yin class I’m teaching tonight at Bound Lotus will certainly involve a little mountain time. Come join me if you can 🙂

The forgotten quads

In my previous post on yin poses, I somehow completely left off ones that target the quadricep muscles at the front of the thigh. It is possible to stretch the quads in some of the postures I listed (like dragon and swan from the hip openers group and sleeping swan and thread the needle from the outer-thigh and butt stretches), but there are a few yin yoga poses that really access the top of the thighs.

So with my apologies to the fronts of my thighs, here are a few more poses that should have been part of Strike a (yin) pose.

Quadricep stretches

Known as rock pose or seiza, sitting on your heels is an uncomplicated way to stretch into the quads. Some yin teachers start their classes with a short meditation in rock pose; others use it as a recovery pose after forward or backward bends; I like it in both contexts and as a quad stretch on it’s own.

Taking rock pose and lowering the back down to the mat turns it into saddle pose. Keeping one leg straight along the mat turns it into half saddle pose and often introduces a bit of a twist into the low back.

Coming out of half saddle is often a bit of a challenge; I like rolling onto my side and hugging my knees to my chest in fetal pose for a few seconds before flattening out on my back for a rest.


No list of yin yoga poses would be complete without targeting all the large muscle groups of the lower body! Hopefully my quads will forgive my original omission of quad stretching postures 😉

Strike a (yin) pose

I tend to think of the yin yoga poses I teach and practice in loose groupings based on their purpose within a practice and which areas of the body they primarily affect. These groupings are not absolute and students all feel postures in different ways. A pose that one person feels very intensely in one area, someone else might not feel there at all.

There are many ways to modify these postures to increase or lessen their intensity and, of course, many other possible postures to use in a yin yoga practice; these are just a sampling.

Most yin yoga poses have equivalents in other forms of yoga, but the yin versions are intended to be static, allow the muscles to relax, and exercise the joints to their full range of motion.

The neat stick figure drawings come from Yoga with Amey.

Backward bends

These are helpful to counteract all of the forward bending most people do throughout the day – hunching over a desk or a steering wheel. The target areas are generally the spine (anywhere from the sacrum up to the neck) and chest.

Typical backward bending poses are sphinx (shown at right) and seal.

Back bends can also be wonderful chest openers. I like using a supported fish or bridge (shown at left) to stretch the chest muscles, open the shoulders, and bring some compression into the back. I’ve previously posted detailed information on supported fish if you’d like to know more about that pose.

Forward bends

These are great for stretching the spine and releasing tension along the spinal column and through the shoulders. Standing forward fold (or dangling as I usually call it), pictured at right, is one of my favourite ways to release tension across the upper back and shoulders and stretch the hamstring muscles at the back of the thighs.

Caterpillar, pictured at left, is a seated forward fold that targets similar areas as dangling, although it can also be good for stretching the muscles of the buttocks (or glutes) depending on the tilt of the pelvis.

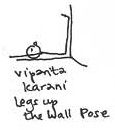
If you want to get a gentle stretch through the back of your legs, but are worried about the impact of dangling or caterpillar on your back, legs up the wall, pictured at right, is a great option. This is one of my go-to poses (as I detailed in a previous post) and is fabulous for people with lower back issues. 

Other forward folds like butterfly and half butterfly (shown at left) are good for stretching into the hamstrings as well and can also target the glutes (muscles in the buttocks), inner thighs, and spine.

Groin stretches

The inner thigh or groin area can be difficult to stretch; thankfully, there are a couple of yin yoga poses that are good for targeting this area. Dragonfly, pictured at right, and frog are the two postures I use most often. Both poses are easy to modify depending on the tilt of the pelvis and width of the legs and it’s also easy to use props to make them comfortable.

Holding a squatting pose (shown at left) for a minute or more and gently pressing the knees apart can also be an effective groin stretch, although some people feel the stretch more through their thighs or buttock muscles.

Hamstring stretches

In addition to accessing the backs of the thighs by holding forward bending postures, happy baby (shown at right) is another good way to stretch the hamstring muscles. I sometimes jokingly call the pose ‘angry baby’ as the compression in my hips brings out all kinds of rage and frustration!

Hip openers

Most people I know complain of having tight hips. Generally they mean that their hip flexors (the group of muscles used to pull the knee upwards) feel stiff, stuck, or inflexible.

The single greatest yoga pose I know to target the hip flexors is a modified lunge (pictured at right) known as dragon. Dropping the back knee to the ground in dragon, as opposed to holding it up in a lunge, means that students can stay in the pose for a few minutes. Dragons can also target other areas and make people angry as I outlined in a previous post.

Swan, shown below in the section on outer-thigh stretches, can be another wonderful opener for the hip flexors.

Resting

In between more intense yin yoga holds, there are many wonderful postures to come into for a rest. Simply standing in mountain, shown at right, or lying flat on the mat, allows students to feel the impact of the previous hold.

Child’s pose, pictured at left, or fetal pose are great to counter backward bends and can help move through feelings of frailty that may arise after intense long-held postures.

In order to get blood and energy moving through the body again after poses that compress the knees or ankles, I frequently have students move their knees in windshield wipers or drum their feet and legs against the ground.

And then there’s savasana or corpse pose, the ultimate posture of relaxation!

Outer-thigh and butt stretches

Runners in particular often struggle with tightness in their outer-thighs, specifically the IT tract, which is the band of fascia that extends from the hip to the knee. Tightness in the outer-thighs generally goes hand-in-hand with unhappily tight butt muscles (also known as the glutes), which are some of the most powerful muscles in the body.

Square, shoelace, and sleeping swan (a yin version of the pigeon pose pictured at right) are all effective at targeting the muscles and fascia in the IT tract and buttocks. Lowering the chest towards the mat in these postures elongates the glutes and outer-thighs.

Threading the needle is another posture that can have profound impact on the IT tract and butt muscles. It’s one of my favourite poses and is particularly great to do against a wall.

Twists

Gentle spinal twists like cat stretch, shown at right, and two knee twist really illustrate the idea of a yin practice. Reclining twists are quite simple and it’s easy to think they’re not doing anything, but the deep stretch can be incredibly profound after a long hold.

Twisted roots, pictured at left, involves crossing one leg over the other in a reclined twist and targets the glutes and IT band as well as gently compressing the spine.

All twists can also help open the chest and stretch throughout the hips and legs.

There are lots of other possible yin yoga poses and many more postures I regularly draw on in my classes. These are a few of the basics that give a sense of what kind of poses to expect in a yin yoga class. I’ve also done a post on what to expect more generally in a yin yoga class and what my idea of yin yoga is.